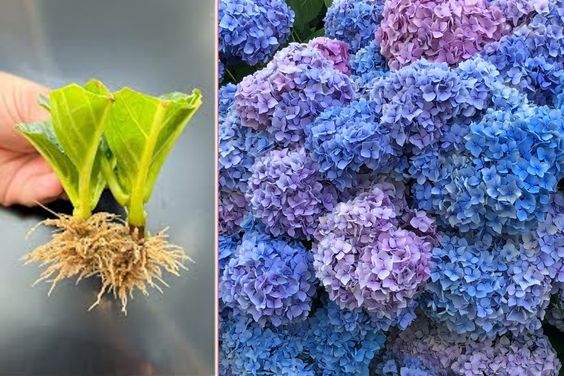
Propagate Hydrangea from Cuttings and expand your plant collection at zero cost. These easy tips will help you in accomplishing this task.
Hydrangeas are beautiful and popular flowering plants that can be propagated easily from cuttings. Follow this guide to Propagate Hydrangea from Cuttings and save your money.
Hydrangeas Plant Information

The hydrangea plant produces large, showy flower clusters in shades of pink, blue, white, and purple. The pH level of the soil in which hydrangeas are planted can influence the color of their blooms, which can range from slightly acidic to slightly alkaline.
It prefers moist, well-draining soil and partial shade. Pruning should be done in late winter or early spring. Hydrangeas can be propagated through stem cuttings. They are popular in gardens and as cut flowers.
Preparation Before You Propagate Hydrangea from Cuttings
- The best time to take the hydrangea cuttings is from mid-spring to early summer.
- Take semi-hardwood cuttings; do not cut overly soft or hard stems. Also, avoid snipping dull stems. It will be great to take cuttings from a branch that is not blooming.
- Water the plant properly one day before taking the cuttings, ensuring it hasn’t dried out for at least two weeks.
- Take the cuttings in the early morning and cut multiple cuttings to increase your chances of success.
- You can propagate hardwood cuttings from hydrangeas in late summer or fall, but note that they take longer to grow. The method remains the same.
Tips to Propagate Hydrangea from Cuttings

1. Things You’ll Need
- Sharp pruning shears or a clean knife
- Rooting hormone (optional but can increase success rates)
- A clean container filled with a well-draining rooting medium (such as a mixture of perlite and peat moss)
- Clear plastic bag or a propagating tray with a clear plastic cover to create a humid environment.
2. Select cuttings
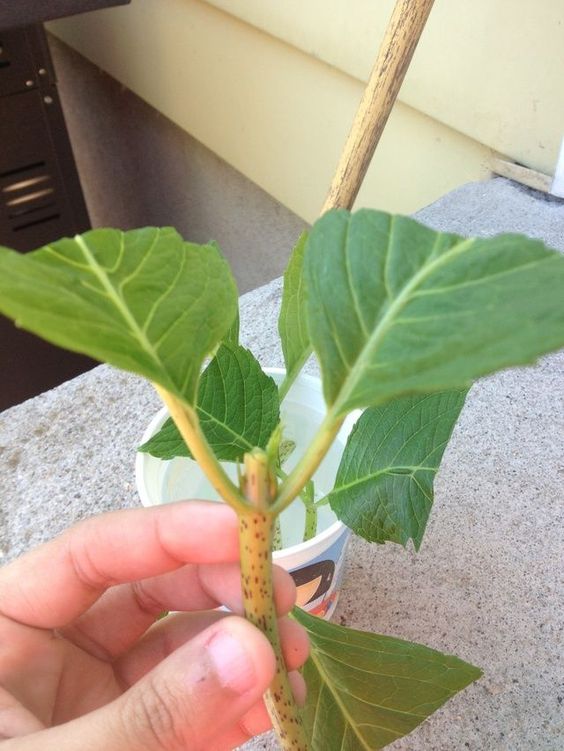
Choose healthy, non-flowering stems for cuttings. Look for stems that are around 4 to 6 inches long and have several leaf nodes (the points where leaves emerge). Make a clean, diagonal cut just below a leaf node. Remove any lower leaves, leaving only a few leaves at the top.
3. Prepare cuttings
If using rooting hormone, dip the cut end of the stem into the hormone powder, tapping off any excess. This step can help promote root development but is optional. It is important to follow the instructions on the rooting hormone package.
4. Plant cuttings
Make a hole in the rooting medium using a pencil or your finger. Insert the cut end of the hydrangea cuttings into the hole, ensuring that at least one leaf node is buried beneath the soil. Gently firm the soil around the cutting to provide stability.
5. Create a humid environment
If using a clear plastic bag, place it over the container to create a mini greenhouse. Alternatively, if you have a propagating tray with a clear plastic cover, use that. Ensure the plastic doesn’t touch the leaves of the cutting.
6. Placement
Place the container or propagating tray in a warm, bright location but away from direct sunlight. Indirect light is ideal for rooting. Avoid exposing the cuttings to extreme temperature fluctuations.
7. Maintenance
Check the cuttings regularly to ensure the soil remains moist but not waterlogged. Mist the leaves occasionally to maintain humidity. If condensation forms inside the plastic covering, briefly remove it to allow fresh air circulation and prevent fungal diseases.
8. Rooting time
Rooting times can vary, but it generally takes several weeks for hydrangea cuttings to develop roots. You can gently tug on the cutting after a few weeks to check for resistance, indicating the presence of roots.
9. Transplanting
Once the hydrangea cuttings have an established root system, you can transplant them into individual pots with potting soil. Continue to care for them as you would for mature hydrangea plants.
