

The Vanilla Bean Orchid is a beautiful vine with edible pods and pretty flowers; it can be grown as a houseplant with proper care.
The Vanilla bean orchid is a popular houseplant among serious gardeners who are up for its tough care needs. It needs specific conditions and has to be pollinated by hand to make seeds. It is not a good choice for beginners, and having some experience with growing orchids helps. A greenhouse is a great idea, especially if you don’t live where is warm surroundings all the time.
Vanilla Bean Orchid Information

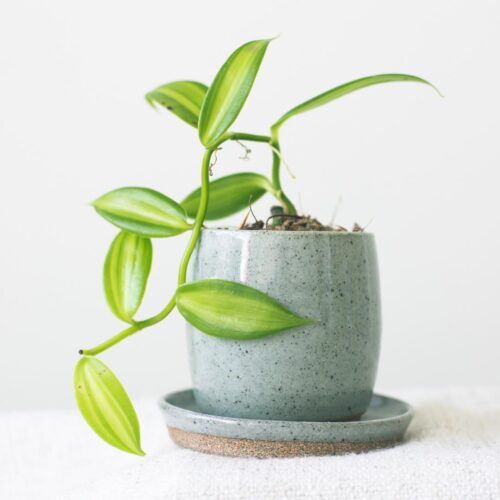
The Vanilla bean orchid (Vanilla plantifolia) is often called “vanilla” because its seed pods make natural vanilla flavoring for desserts and drinks. Getting this plant to flower and produce seeds for vanilla is tough, but its shiny green vine looks nice even without the pods. This vine can reach up to 4-10 feet long. It offers white and yellow blooms over blue-green leaves.
USDA Zones: 10-11
Propagating Vanilla Bean Orchid
Growing vanilla bean orchids from seed is difficult. Hence, this plant is generally propagated from stem cuttings.
Take a piece of a vine with at least six growth nodes and discard two lower leaves from the cutting. Fill a small pot with a mix of equal parts of peat moss, orchid bark, and perlite or moist sphagnum moss.
Plant the cuttings, cover the lower nodes, and press the growing medium near the base of the cutting. Place a stake for support in the pot, and gently secure the cutting to it with cotton ties. Keep the soil moist for up to 4-6 weeks till new growth emerges. When cuttings start to vine, train the plant to climb on a big trellis.
Types of Vanilla Bean Orchids
Handa
Vanilla planifolia ‘Handa’ is a new variety resembling the species plant in appearance, fruit, and vanilla content. This particular variety is good for commercial growers because of its resistance to several diseases.
White Variegated
Vanilla planifolia ‘Variegata albomarginata’ is distinguished by its attractive variegated foliage with white margins. This rapidly growing vine is an excellent choice for homeowners because it offers the same flavorful vanilla beans as its solid-green-leaved counterpart, Vanilla planifolia.
Ideal Growing Conditions for Vanilla Bean Orchid
Light
Vanilla bean orchids require adequate light to bloom, yet excessive sunlight can harm them. For optimal growth, position indoor vanilla bean orchids near a window where they can receive bright, indirect light. If utilizing a grow light, ensure it remains on for 12-14 hours each day.
Soil
Similar to many other epiphytes, vanilla bean orchids are susceptible to root rot, making it essential to a well-draining potting mix. Conventional orchid mixes are suitable for these plants, or you can create your own DIY orchid mix using ingredients like coco coir, perlite, and bark chips.
Water
Consistent watering is crucial for vanilla bean orchids, but moderation is key. Throughout the growing season, potted plants should receive regular watering, approximately two or three times per week, with even less frequency during winter. Ensure thorough drainage after each watering session, and mist the exposed aerial roots daily using a hand sprayer.
Temperature and Humidity
Maintaining optimal temperature and humidity levels for vanilla bean orchids can be challenging. While they can tolerate temperatures above 60°F, these plants thrive when daytime temperatures range from 80°F to 85°F, with nighttime temperatures dropping to 60°F to 65°F. Protect them from drafts, as they do not tolerate chilling well.
Similar to many other orchids, vanilla bean orchids require moist air and humidity levels of 70–80 percent. While misting alone may not sustain consistently high humidity, placing the orchid on a pebble tray or near a humidifier can effectively increase humidity levels.
Vanilla Bean Orchid Care
Fertilizer
During the spring and summer, fertilize your vanilla orchid every two weeks using orchid fertilizer. Follow the instructions on the product label for the appropriate amount to use. Consistent but gentle fertilization is advisable for optimal growth.
Repotting
Repot vanilla bean orchids approximately every three years or when you observe their aerial roots poking out from the pot. Select a pot that is only one size larger than the current one. Always use fresh orchid mix for repotting. Before repotting, examine the roots after removing the orchid from its pot. Trim any damaged or rotted roots with sterilized scissors.
Pruning
While pruning vanilla bean orchids is typically unnecessary, it can be done if the plant becomes overly large or if you wish to propagate it. Employ sharp, sterilized scissors or a knife to trim the stems at a leaf node.
Note: However, vanilla bean orchid is not poisonous but it will be better to wear gloves while handling it as the stems and roots contain sap that can irritate the skin.
Pests and Diseases
Sun damage is a common problem on vanilla bean orchids when they are exposed to bright light. Additionally, if you plan to grow these orchids indoors or in your garden, it is important to be mindful of several other common pests and issues.
One such pest is the mealybug, a small insect that feeds on plant sap and appears as fluffy bits of cotton on leaves and stems. While large infestations can lead to significant damage, small populations can be effectively managed by spot-treating pests with a cotton swab dipped in rubbing alcohol.
Similar to mealybugs, spider mites feed on plant sap, potentially weakening orchids and causing blemishes on their leaves. The positive news is that these pests can be effectively controlled by spraying plants with a diluted solution of gentle dish soap and water. Repeat this treatment every 7 to 10 days until all indications of infestation have vanished.
For vanilla bean orchids, it is necessary to use well-draining pots and potting mixes to prevent root rot, which can occur in excessively moist conditions. Water these orchids sparingly, only when necessary, and ensure that any excess water can freely drain out of the pot to reduce this common issue.
Harvesting and Storage
After successfully hand-pollinating vanilla flowers, the blooms wilt and convert into long pods within approximately a week. These pods require about 8 to 9 months to ripen on the plant and are deemed ready for harvesting when they reach a length of approximately 6–9 inches. Curing the pods prior to use is essential to developing the distinctive vanilla flavor.
The curing process is labor-intensive and encloses sweating and drying, factors that contribute to the premium pricing of vanilla beans in markets. Over a span of six weeks, the beans are wrapped nightly in a blanket to encourage moisture condensation on the pods. During the daytime, the beans are placed on trays under the sun or under a heat lamp indoors. Subsequent to this sweating phase, the now-brown and shriveled pods are dried in a dark, dry location for an additional three months. The cured beans can then be stored indefinitely in an airtight container.